

Step 1: Get a favorite charm pack. I am using Hello Luscious by Basic Grey.

Step 2: Sort your charm squares out. For this mini, we will need 6 charms for the background, 12 for the backing, 4 for the flowers, and 2 for the leaves. Leave the extras for our next project. :) Here's what I ended up with.

Step 3: Piece the background. You'll need a grid that is 2 x 3 charms. Sew two rows of three and then join the two rows.

Step 4: Prepare the appliques. Start by tracing circles on the back of the pink charms. Don't worry if they aren't perfect! I used a FriXion pen because it will disappear when I hit it with the iron!

You'll need to make six circles like so ...

Next, draw some leaves like you did with the circles. Make three. Again, no worries about perfection!

Cut them out.

I then ironed mine to make the ink go away!

Lines are gone! Love that!

Now, adhere your appliques with a little bit of Stitch Witchery under each of the layers. Just enough to tack it down.

Step 5: Stitch the applique pieces down. I like to use a clear foot for this and stitch about 1/8 inch away from the edge. Flip the top layers out of the way and do the bottom layers (leaves) first.

When you are done it should look like this.

Step 6: Piece the backing. You'll need a 3 x 4 rectangle of charms. Make 3 rows of 4 and then stitch together the rows. You'll want to press seams open for this step.

Step 7: Layer and quilt your mini.

Use a ruler to make sure the top is centered on your backing.

Quilt as desired - but not all the way to the edges. This will be important in the next step! I quilted up to about 1/4 inch from the edges.

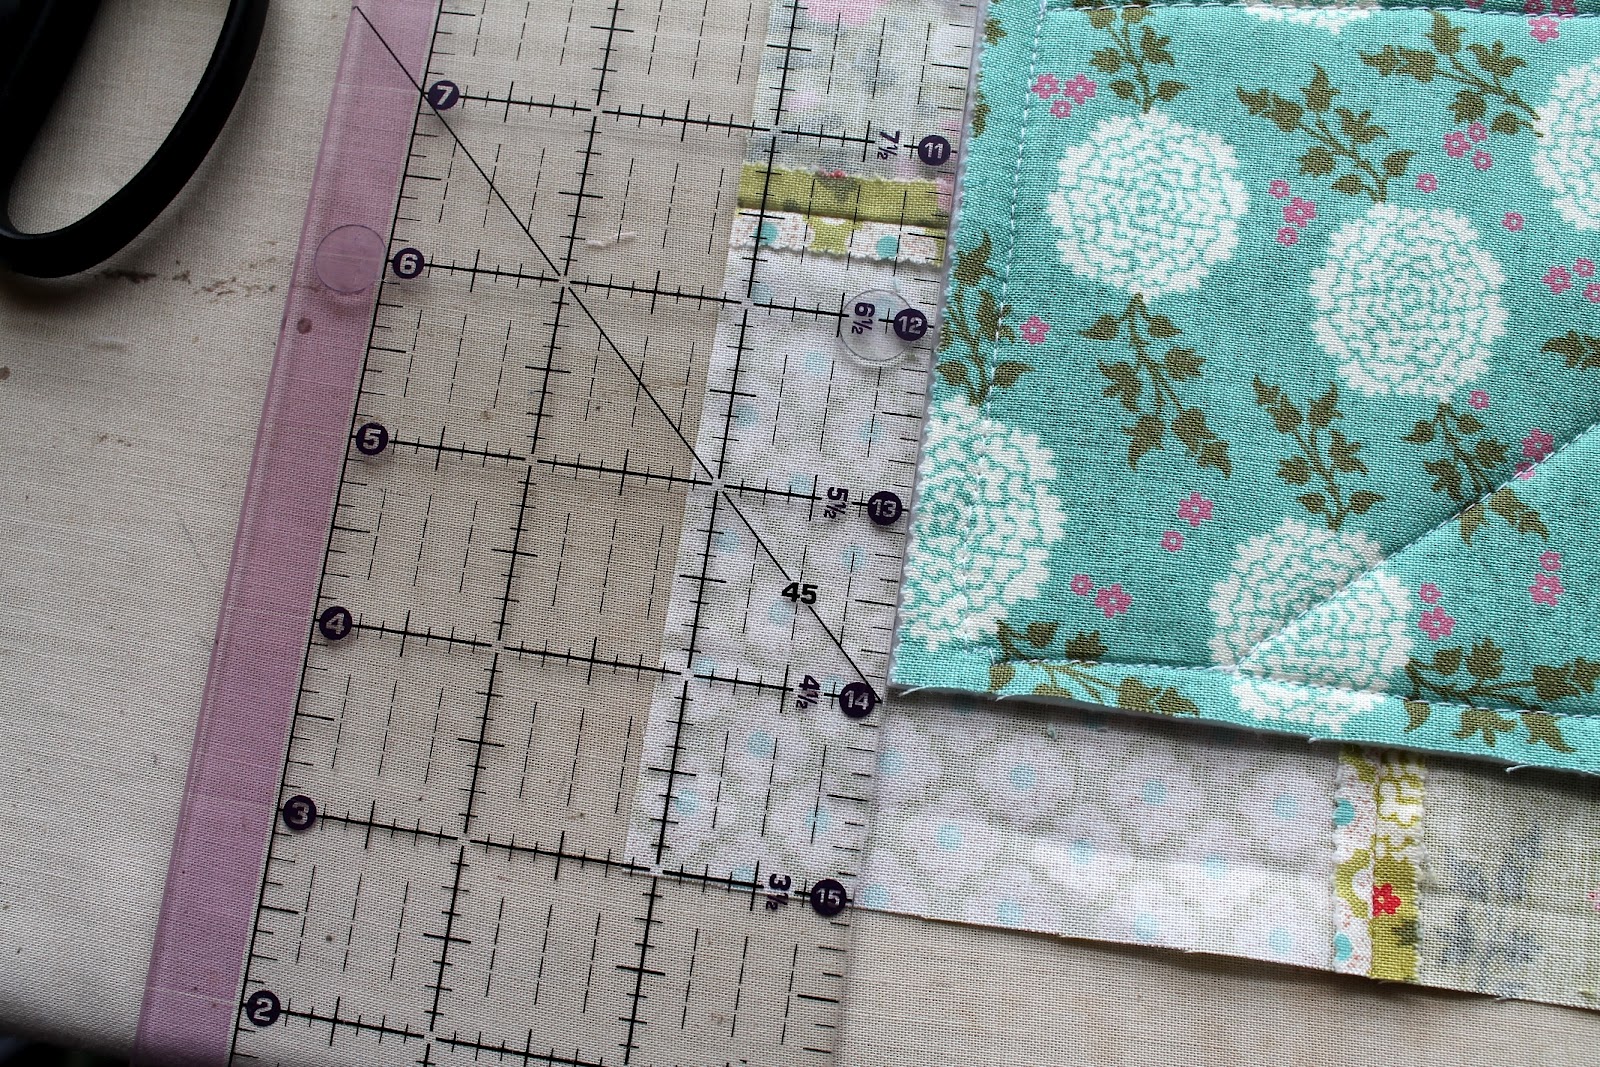
Step 8: Trim the mini. Start by folding the backing over so it will be out of the way.

Trim the front and batting ONLY!

Then bring the backing back behind the mini so you can trim it down.

Trim to 1-1/8 inches all the way around. (Click on the photo to enlarge, if needed. :-)
Step 9: Prepare the binding. Start by folding the edge of the backing toward to the edge of the top and batting. Press in place.
Then, fold it over and pin in place.

For the corners, you'll flip the next side over at angle before moving on.

Then fold the raw edge of the backing in to the edge of the batting and top.

Next, continue around the entire top. Pinning everything in place.

Stitch the binding down. I used a walking foot and stitched close to the edge of the fold.

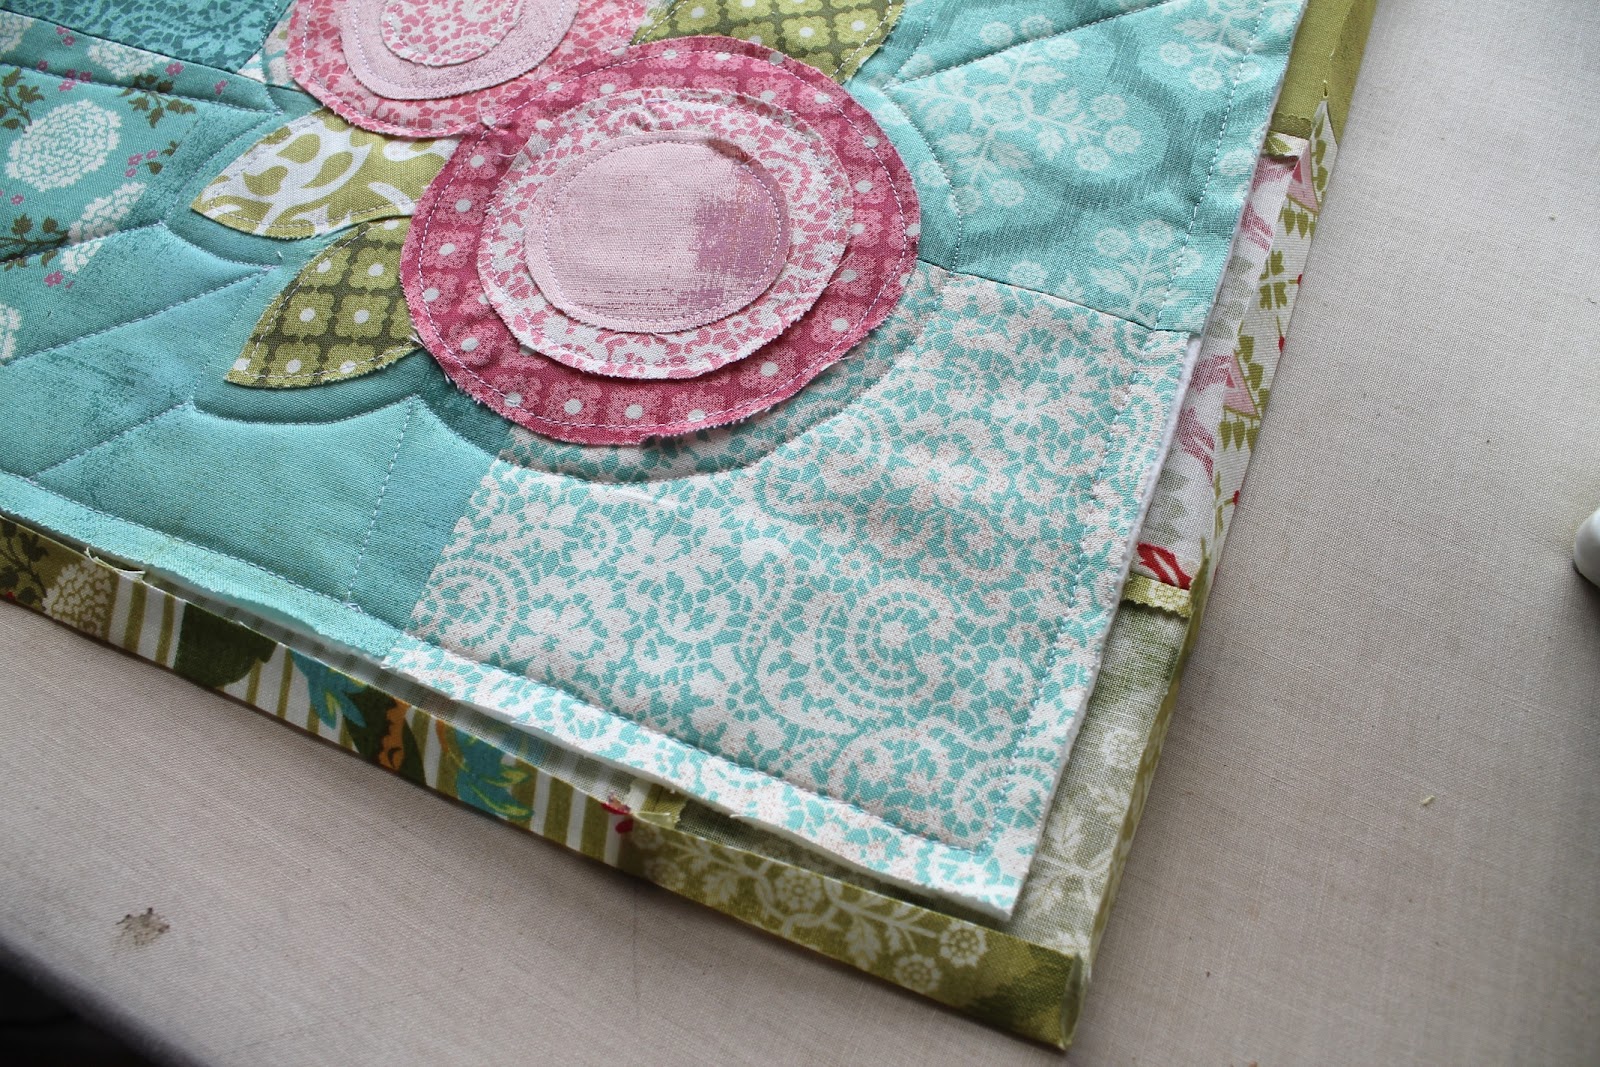
Next, admire your work! Here's the back of mine ...

This charm pack had 2 darker red prints. I used them in the middle of the back since I wanted the greens for my binding.
And here is the front ...

I hope you enjoyed this tutorial. If you need a better look at any picture, just click on it to enlarge it. And, as usual, if you have any questions, please email me or leave a comment. And link us up if you decide to make one - I'd love to see it!
Happy Sewing! :-)
This looks like fun and a quick project for a weekend.
ReplyDeleteChrissy, this is so sweet! A wonderful tutorial. I have a circle cutter and I'm always on the look for a project to use it with. I could make circles all day! Thank you muchly!
ReplyDeleteWhat a cute mini quilt! Thank you for sharing the tutorial!
ReplyDeleteThanks, this is really cute and a great tutorial.
ReplyDeleteLove it! These would be great spring placemats!
ReplyDeleteThanks.It`s absolutely beautiful!
ReplyDeleteWhat a nice way to learn applique! Thank you.
ReplyDeleteGreat project! I can't wait to try it! I'm really enjoying your blog. Thanks!
ReplyDeleteI made this cute mini and added a hanging sleeve:
ReplyDeletehttp://www.flickr.com/photos/53634609@N05/7019600595/in/photostream
I just found your blog. I have me charm pack will get started!
ReplyDelete